 Save
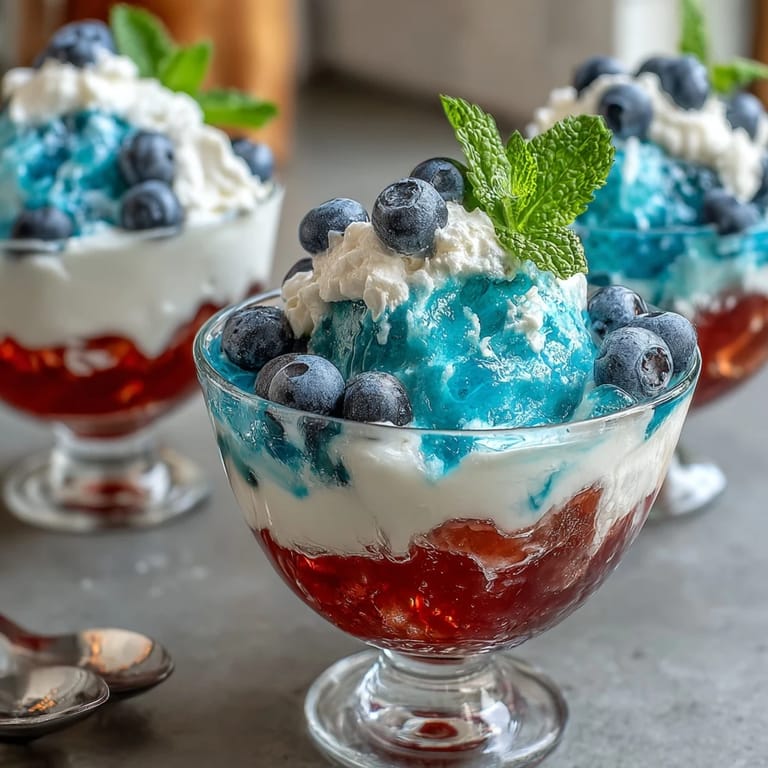
Save My daughter came home from school with a hand-drawn invitation to a Fourth of July potluck, and naturally, she'd drawn these perfect little striped cups in the corner. I'd never made layered Jello before, but watching her eyes light up as I explained how the colors would stack made me determined to get it right. There's something magical about creating desserts that look like edible art, especially when you know exactly who's going to be amazed by them.
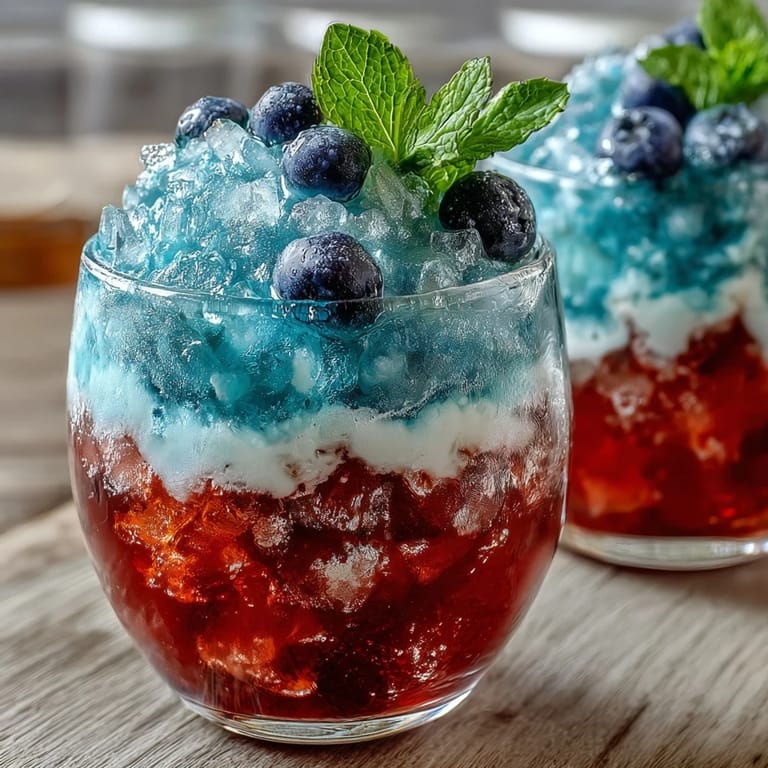
I remember standing at my kitchen counter at midnight on the Third of July, slightly panicked because I'd waited until the last minute. But here's the thing: by the time the sun came up the next morning, those cups were absolutely perfect, sitting in the fridge like little edible flags. My daughter helped me add the whipped cream and berries that afternoon, and when we arrived at the potluck, people actually gasped. That moment when someone's face lights up because of something you made is exactly why I keep cooking.
Ingredients
- Strawberry or cherry flavored Jello (3 oz box): This is your red base layer, and the flavor really does matter because you'll taste every bit of it without other ingredients competing.
- Boiling water: You need it hot to properly dissolve the gelatin, so don't use water that's been sitting around cooling down.
- Cold water: This stops the cooking process and gets your Jello to the right consistency for setting.
- Unflavored gelatin (1 envelope): This is the secret to your white layer, giving it body and structure without any competing flavor.
- Sweetened condensed milk: What makes the white layer creamy and luxurious, it also keeps the whole thing stable as it sets.
- Blue raspberry flavored Jello (3 oz box): The top layer that brings everything home visually and flavor-wise.
- Whipped cream and fresh berries (optional): These transform your cups from impressive to showstopping, and the tartness of the berries cuts through the sweetness beautifully.
Tired of Takeout? 🥡
Get 10 meals you can make faster than delivery arrives. Seriously.
One email. No spam. Unsubscribe anytime.
Instructions
- Set up your cups with care:
- Grab your eight clear cups and arrange them somewhere stable and near your refrigerator. You'll want them ready to go the moment your first layer is mixed.
- Create the red layer:
- Dissolve the strawberry Jello in one cup of boiling water, stirring for about two minutes until you don't see any granules at the bottom. Add the cold water and stir gently, then divide the mixture evenly between your cups, using about two tablespoons per cup. Place the cups into a muffin tin at a slight angle and refrigerate for forty-five to sixty minutes until the layer is set but still slightly jiggly on top.
- Prepare the white layer:
- In a clean bowl, sprinkle the unflavored gelatin over the cold water and let it sit for five minutes so it blooms. Pour the boiling water over it and stir constantly until every bit of gelatin dissolves, then add the sweetened condensed milk and whisk until smooth. Let this cool to room temperature so it doesn't melt your red layer when you pour it on.
- Add the white layer:
- Once your red layer is completely set, straighten your cups upright and carefully pour the white mixture on top of each one, about two tablespoons per cup. Return them to the refrigerator for another forty-five to sixty minutes until this layer is firm to the touch.
- Mix the blue layer:
- Dissolve the blue raspberry Jello in one cup of boiling water, stirring until smooth, then add the cold water. Let this cool to room temperature because warm Jello will absolutely melt through your white layer like it's not even there.
- Complete the layering:
- Pour the cooled blue Jello gently over the white layer, about two tablespoons per cup, and refrigerate upright for at least two hours until everything is completely set and holds its shape when you gently shake a cup.
- Finish with flair:
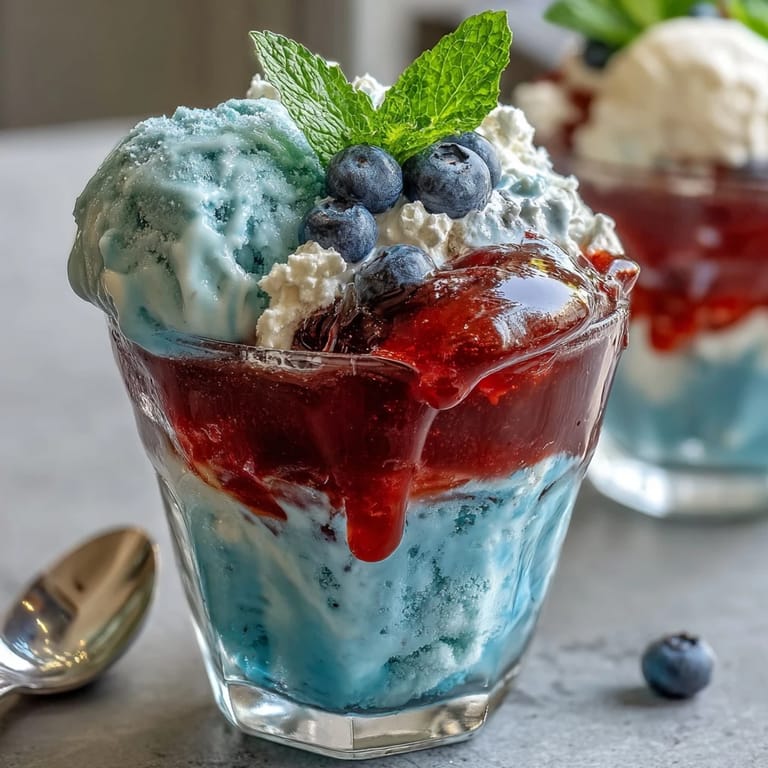
- Top each cup with a dollop of whipped cream and a scatter of fresh blueberries and strawberries right before serving, which adds both flavor and that final patriotic pop.
 Save
Save There's a quiet satisfaction in opening the refrigerator and seeing those cups sitting there, looking like little American flags made of something you can actually eat. My daughter took photos of them before we left for the potluck, and she still has one saved on her phone. That's when I realized this recipe isn't just about the dessert itself, it's about creating a moment people remember.
The Angled Chilling Trick
The muffin tin trick might seem random, but it actually works brilliantly. When you tilt your cups at an angle for the red layer, you create a wider surface area that sets more evenly and gives you that perfect slant that makes the stripes look even more dramatic when you straighten the cups. I discovered this completely by accident because I knocked a cup over and had to prop it up with a muffin tin, but then I realized it looked better that way. Now I do it intentionally every time, and honestly, it's become my favorite part of the whole process.
Timing Matters More Than Perfection
Don't stress about pouring each layer with absolute precision. The beauty of these cups comes from the fact that they're clearly layered, not from having perfectly geometric lines. I've poured layers slightly unevenly before, and the imperfection actually made them look more homemade and charming. The colors are bold enough that even if they blend a tiny bit at the edges, the overall effect is still stunning and you'll be the only one who notices the minor imperfections.
Flavor Variations That Keep It Fresh
Once you nail the basic technique, you can swap out the flavors to match whatever celebration you're making these for. I've done lime, lemon, and blue for a different patriotic vibe, and I've also done raspberry, vanilla, and blueberry for a more berry-forward dessert. The white layer stays the same, but changing the red and blue Jello flavors keeps the recipe from ever feeling stale, and honestly, your family will love having a reason to try new combinations.
- Experiment with grape and strawberry if you want deeper, richer colors that feel extra special.
- Make them any time of year by swapping the patriotic theme for whatever occasion you're celebrating.
- Double the recipe easily because these cups actually improve on the second day after the flavors have melded together slightly.
 Save
Save These layered cups have become my go-to celebration dessert because they're simple enough that I don't stress about them, but special enough that people genuinely light up when they see them. Every time I make them, I remember that first Fourth of July and how proud my daughter was to bring them to the potluck.
Recipe FAQs
- → How do I achieve sharp layers in the jello cups?
Allow each layer to fully set in the refrigerator before adding the next layer to maintain clean, distinct stripes.
- → Can I substitute the sweetened condensed milk for a dairy-free option?
Yes, you can use coconut milk and sugar instead of sweetened condensed milk to create a dairy-free version.
- → What tools are necessary for making these layered cups?
You’ll need mixing bowls, measuring cups, a whisk or spoon, clear cups for layering, and optionally a muffin tin to chill cups at an angle for better layering.
- → Are there flavor alternatives for the red and blue layers?
You can swap out red and blue berry flavors with other fruity gelatin flavors to customize the colors and tastes.
- → How long should I chill the entire dessert before serving?
After assembling all layers, refrigerate the cups upright for at least two hours to ensure the jello is fully set.