 Save
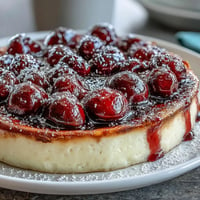
Save The smell of cinnamon hitting warm apples still stops me in my tracks, every single time. My grandmother's kitchen would fill with that exact fragrance on Sunday mornings, and I'd drift downstairs before anyone else woke up. This apple pie became my way of recreating those quiet, stolen moments when the house felt like it belonged just to me and the oven timer.
I once served this at a dinner party where everyone was too polite to admit they were full, then watched in delighted horror as my friend Sarah proceeded to eat three slices while standing at the counter. That's the thing about this pie—it refuses to be ignored. People who claim they dont dessert will suddenly remember they have room for just one more piece.
Ingredients
- 2 1/2 cups all-purpose flour: This forms the foundation of your crust, and measuring it correctly makes all the difference between tender and tough
- 1 tsp salt: Just enough to wake up the flavors without making anything taste savory
- 1 tbsp granulated sugar: A subtle sweetness in the crust that helps it brown beautifully
- 1 cup unsalted butter, cold and cubed: Keep this ice cold, seriously, warm butter is the enemy of flaky layers
- 6-8 tbsp ice water: Add this gradually, you might not need all of it, and you'll know the dough is ready when it just holds together
- 6-7 medium apples: Mix Granny Smith for tartness and structure with Honeycrisp for sweetness and that perfect apple flavor
- 3/4 cup granulated sugar: The baseline sweetness that lets the apples shine without overpowering them
- 1/4 cup light brown sugar: This adds a caramel note and helps create that gorgeous thick filling
- 1 1/2 tsp ground cinnamon: The classic warming spice that makes everything smell like comfort
- 1/4 tsp ground nutmeg: Just a hint adds depth without making it taste like holiday potpourri
- 1 tbsp lemon juice: This brightens everything and keeps the apples from turning brown while you work
- 2 tbsp all-purpose flour: The secret to a filling that sets up perfectly instead of being soupy
- 2 tbsp unsalted butter: Those little pats of butter melting into the apples create pockets of incredible richness
- 1 egg beaten with 1 tbsp milk: Your golden ticket to a crust that glistens like it came from a professional bakery
Tired of Takeout? 🥡
Get 10 meals you can make faster than delivery arrives. Seriously.
One email. No spam. Unsubscribe anytime.
Instructions
- Make the Pie Crust:
- Whisk flour, salt, and sugar in a large bowl, then work in that cold butter until everything looks like coarse crumbs with some pea-sized pieces remaining. Sprinkle in ice water gradually, tossing with your hands, just until the dough holds together when squeezed. Divide in half, form into disks, wrap them tight, and let them chill for at least an hour—this step is not optional.
- Prepare the Apple Filling:
- Peel, core, and slice your apples about 1/4 inch thick, then toss them in a large bowl with both sugars, cinnamon, nutmeg, salt, flour, and that tablespoon of lemon juice until every piece is coated. Let them sit while you roll out the crust, which gives the apples time to release some of their juices.
- Assemble the Pie:
- Roll out one dough disk on a floured surface and gently fit it into your 9-inch pie dish, letting any overhang hang loose for now. Pile those apples into the crust, mounding them slightly higher in the center since they'll settle while baking, and dot the top with the small butter pieces. Roll out the second disk, place it over the filling, then trim and crimp the edges to seal everything in. Cut a few decorative slits in the top so steam can escape during baking.
- Apply the Egg Wash and Bake:
- Brush that egg and milk mixture all over the top crust, and if you're feeling fancy, sprinkle some coarse sugar on top for extra crunch. Bake on the lower rack at 400°F for 45 to 55 minutes, until the crust is deeply golden and you can see the filling bubbling through those vents. If the edges start browning too fast, tent them with foil.
- Cool Before Slicing:
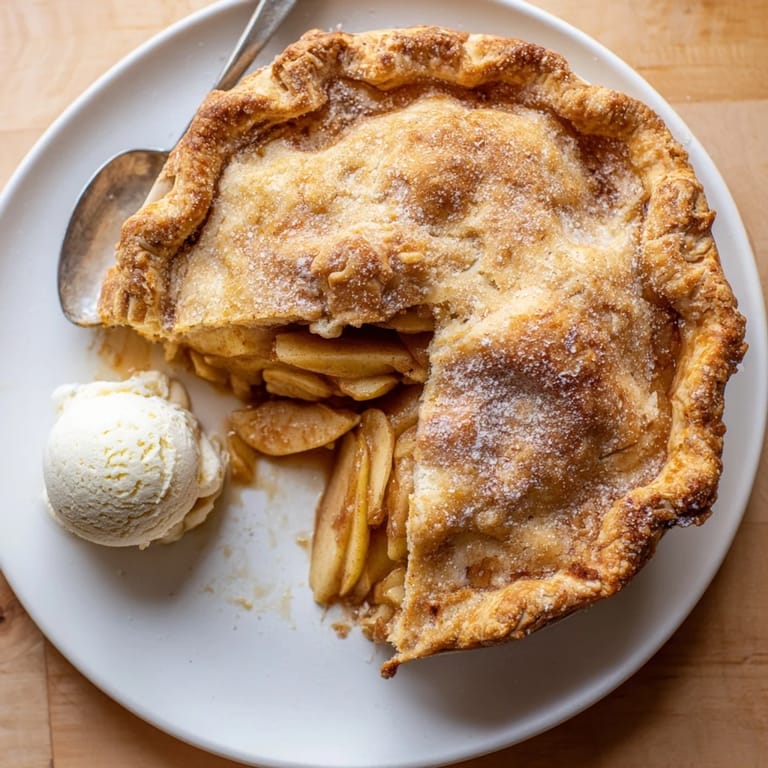
- This is the hard part—let the pie cool on a wire rack for at least two hours so the filling can set properly. I know it smells incredible, but cutting into it too soon means you'll end up with apple soup instead of pie. Serve it warm with vanilla ice cream, or at room temperature if you prefer the filling to hold its shape.
 Save
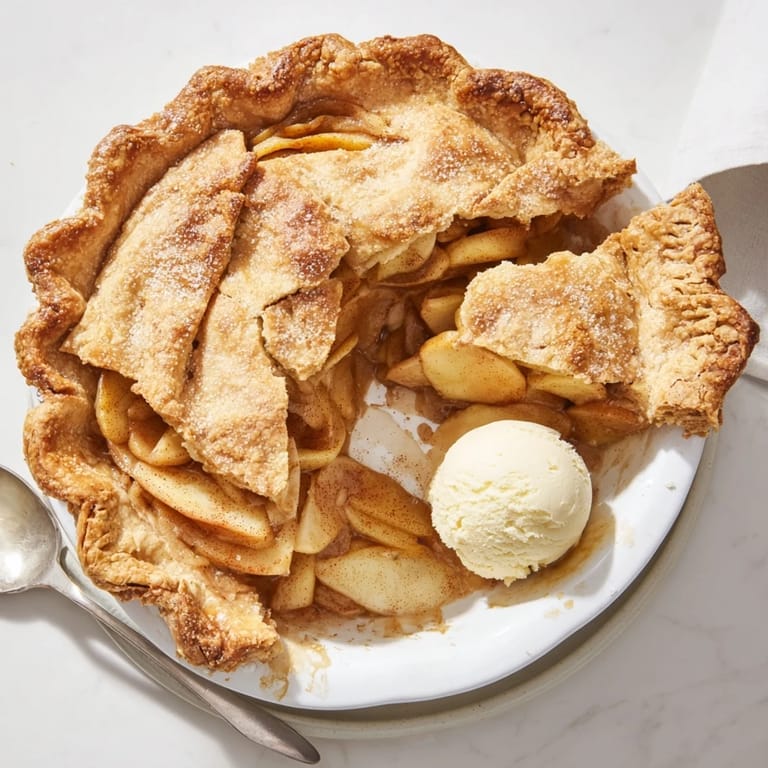
Save Last Thanksgiving, I made three of these pies, and by the time dinner was actually served, only two made it to the table. My uncle had somehow convinced himself that tasting was essential to quality control, and I cant say I disagreed with his methodology. That's the kind of dessert this is—it invites little moments of joy and slightly guilty pleasure.
Choosing the Right Apples
After years of experimenting, I've learned that single-variety pies never quite hit the mark. The combination of tart Granny Smiths and sweet Honeycrisps creates layers of flavor that make people ask what your secret is. Red Delicious might look pretty, but they turn to mush in the oven, so save those for snacking.
Getting That Perfect Crust
The most important lesson I've learned is to handle the dough as little as possible once the water is added. Every touch develops more gluten, which is great for bread but terrible for tender pie crust. Work quickly, keep everything cold, and trust that those visible flecks of butter will transform into flaky magic in the oven.
Serving and Storage
Leftovers keep remarkably well at room temperature for up to two days, covered loosely with foil. The crust actually softens slightly, which some people in my household insist they prefer even more than freshly baked. If you're planning ahead, you can freeze the unbaked pie for up to three months and bake it straight from frozen.
- Place a baking sheet on the rack below your pie to catch any sugary drips before they hit your oven floor
- If your crust is browning too fast, create a foil ring to protect just the edges
- Always cut your pie with a sharp knife that you've dipped in hot water between slices
 Save
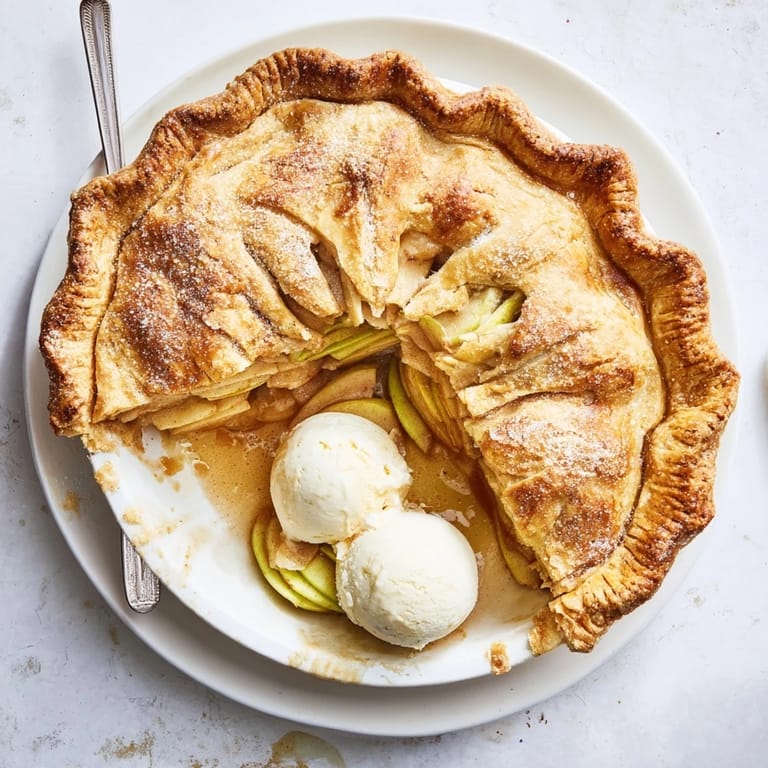
Save There's something deeply satisfying about pulling a golden, bubbling apple pie from the oven, knowing you created something that will gather people around the table. I hope this recipe becomes as special in your kitchen as it has in mine.
Recipe FAQs
- → What apples work best for filling?
Granny Smith apples provide tartness and structure, while Honeycrisp adds natural sweetness. You can also use Braeburn, Jonagold, or Pink Lady for similar results. Avoid Red Delicious as they become mushy when baked.
- → Why must the dough be chilled?
Cold butter creates flaky layers by melting into steam pockets during baking. Chilling also prevents gluten development, ensuring a tender crust rather than a tough one. Refrigerate at least one hour before rolling.
- → How do I know when it's done?
The crust should be deep golden brown, and you should see thick bubbles visible through the steam vents. The filling temperature needs to reach at least 195°F for the apples to properly soften and thicken.
- → Can I make this ahead?
Yes, prepare the dough up to 3 days in advance and refrigerate. You can also assemble the entire pie and freeze unbaked for up to 3 months. Bake from frozen, adding 15-20 minutes to the time.
- → Why did my bottom crust get soggy?
This typically happens from underbaking or not cooling completely. Always bake on the lower oven rack position and let the pie rest for at least 2 hours. This allows the filling to set properly before slicing.
- → What can I use instead of egg wash?
Heavy cream, melted butter, or even maple syrup work well for brushing the crust. For a vegan option, try plant milk mixed with a little maple syrup or agave for golden color.