 Save
Save My neighbor brought these to a block party last summer, and I watched them vanish in under ten minutes. The chocolate was still soft from the heat, the sprinkles glinting under the porch lights, and everyone kept coming back for seconds. I asked for the recipe that night, scribbled it on a napkin, and by the next weekend I was elbow-deep in marshmallows, laughing at how easy it was to recreate that same magic. There's something about adding a chocolate shell to a childhood favorite that makes it feel brand new again.
I made a double batch for my daughter's birthday party and set them out on a tiered stand. The kids grabbed them first, then the adults circled back, admitting they couldn't resist. One mom told me she hadn't had Rice Krispy treats in years, and the chocolate made her feel like she was getting away with something fancy. That's when I realized this recipe sits perfectly between nostalgic and indulgent.
Ingredients
- Unsalted butter: Use good quality butter because it's the base flavor, and always keep extra on hand for greasing your hands when pressing the mixture.
- Mini marshmallows: They melt faster and more evenly than large ones, and I've learned the hard way that stale marshmallows turn the whole batch rubbery.
- Rice Krispies cereal: Measure these gently without packing them down, or your treats will be dense instead of light and airy.
- Fine sea salt: Just a pinch balances the sweetness and makes the chocolate pop, but skip it if you're serving picky little ones.
- Semisweet or dark chocolate chips: I prefer dark chocolate for a less sugary finish, but semisweet works beautifully if you want that classic milk chocolate vibe.
- Vegetable oil or coconut oil: This keeps the chocolate smooth and glossy, and a teaspoon is all you need to prevent cracking when you slice.
- Rainbow sprinkles or chopped nuts: These add color and texture, and I always keep both on hand so guests can pick their favorite.
Tired of Takeout? 🥡
Get 10 meals you can make faster than delivery arrives. Seriously.
One email. No spam. Unsubscribe anytime.
Instructions
- Prep your pan:
- Grease an 8x8-inch or 9x9-inch square pan generously with butter, paying special attention to the corners. If you line it with parchment paper, leave an overhang for easy lifting later.
- Melt the butter:
- In a large saucepan over low heat, melt 6 tablespoons of butter slowly, stirring constantly so it doesn't brown or separate. The gentle heat keeps everything smooth and creamy.
- Add the marshmallows:
- Toss in the mini marshmallows and stir steadily until they're completely melted and the mixture looks like glossy white clouds. Remove from heat as soon as it's smooth.
- Season lightly:
- Stir in a quarter teaspoon of sea salt if you want a little savory contrast. It's subtle but makes the sweetness feel more balanced.
- Fold in the cereal:
- Add all 6 cups of Rice Krispies and fold gently with a spatula until every piece is coated. Work quickly before the marshmallow starts to set.
- Press into the pan:
- Transfer the mixture to your prepared pan and press it down evenly using a buttered spatula or lightly greased hands. Don't press too hard or the treats will be dense.
- Let it rest:
- Allow the base to sit at room temperature for about ten minutes so it firms up just enough to hold the chocolate. This short wait prevents the layers from mixing.
- Melt the chocolate:
- Combine chocolate chips and oil in a microwave-safe bowl, then heat on medium power in 30-second bursts, stirring after each interval. Stop when it's just melted and glossy to avoid scorching.
- Pour and spread:
- Pour the melted chocolate over the cooled base and spread it evenly with an offset spatula or the back of a spoon. Work gently so you don't disturb the cereal layer underneath.
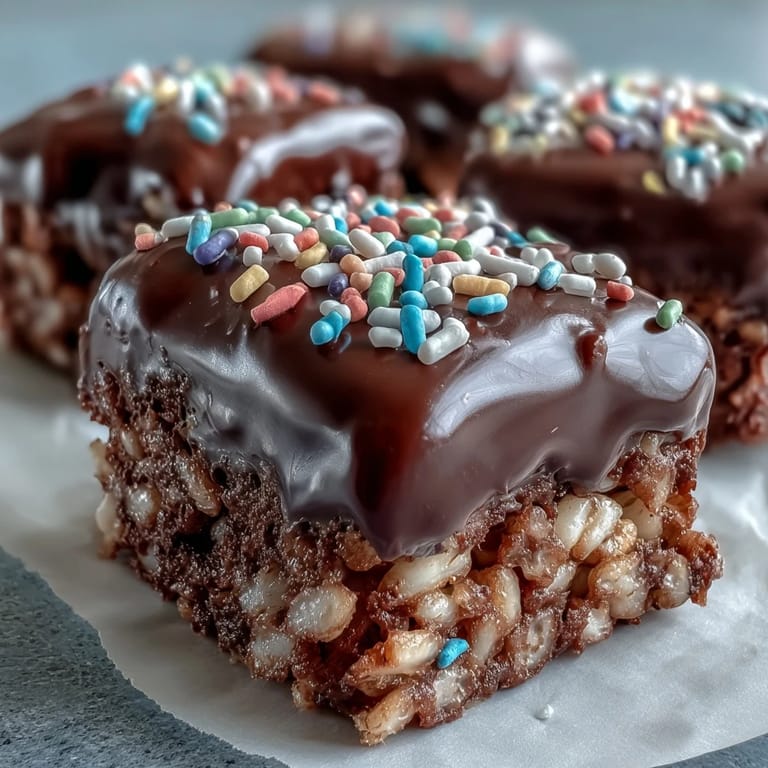
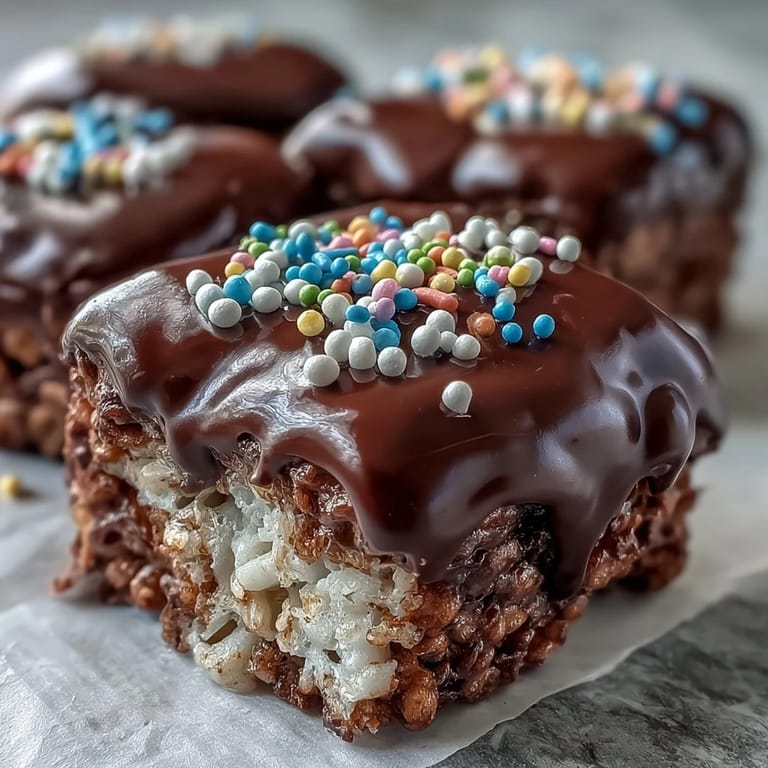
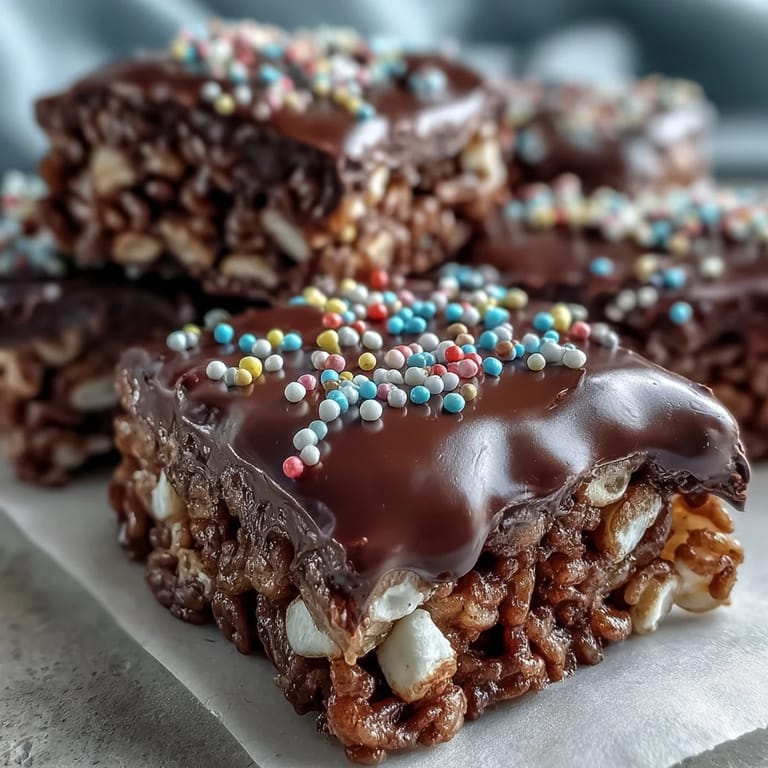
- Add the garnish:
- Immediately sprinkle rainbow sprinkles or chopped nuts over the wet chocolate while it's still tacky. They'll stick beautifully and add a festive finish.
- Let it set:
- Allow the treats to sit at room temperature for at least an hour, or refrigerate for 20 to 30 minutes if you're in a hurry. The chocolate should be firm to the touch before slicing.
- Cut and serve:
- Lift the block out using the parchment overhang or invert it onto a cutting board, then cut into 12 to 16 bars with a sharp knife. Wipe the blade between cuts for clean edges.
 Save
Save The first time I brought these to a potluck, someone asked if I'd bought them from a bakery. I smiled and admitted they took less time than driving to the store. That moment made me realize how a little extra chocolate and a handful of sprinkles can turn something homemade into something people remember.
Flavor Variations to Try
I've swapped the dark chocolate for white chocolate and used pastel sprinkles for spring gatherings, and the lighter flavor feels fresh and playful. You can also stir half a teaspoon of vanilla extract into the melted marshmallows for a hint of warmth that deepens the sweetness. My friend drizzles peanut butter over the chocolate layer and tops it with crushed pretzels, and honestly, it's dangerous how good that combination is.
Storage and Make-Ahead Tips
These keep beautifully at room temperature in an airtight container for up to three days, and the chocolate stays glossy without sweating. If your kitchen is warm, store them in the fridge for up to a week, but let them sit out for a few minutes before serving so the texture softens. I've made the base a day ahead, covered it tightly, and added the chocolate layer the next morning without any issues.
Serving Suggestions
I like to cut these into small squares and arrange them on a platter with fresh strawberries and a bowl of whipped cream for dipping. They're also perfect for packing into lunchboxes or wrapping individually in wax paper for bake sales. If you're feeling fancy, drizzle a contrasting chocolate color over the top in zigzag lines before the base layer sets.
- Serve them slightly chilled on hot days for a firmer, candy-like bite.
- Pair them with cold milk or hot coffee to balance the sweetness.
- Wrap extras in cellophane bags tied with ribbon for easy party favors.
 Save
Save Every time I pull a batch of these out, I'm reminded that the best recipes don't have to be complicated to feel special. They just need a little love, a lot of chocolate, and the willingness to share.
Recipe FAQs
- → How do I prevent the marshmallows from burning?
Melt butter over low heat and stir constantly. Add marshmallows and continue stirring until completely smooth. Remove from heat immediately once melted to prevent scorching.
- → Can I use different chocolate types?
Absolutely. Semisweet, dark, milk, or white chocolate all work beautifully. Just adjust the oil amount slightly—white chocolate may need a bit more for proper consistency.
- → Why is my chocolate topping uneven?
Let the treats cool completely before adding chocolate. Use an offset spatula to spread melted chocolate evenly in a thin layer. Work quickly before it sets.
- → How should I store these treats?
Keep in an airtight container at room temperature for 3 days, or refrigerate for up to a week. Separate layers with parchment paper to prevent sticking.
- → Can I make these ahead of time?
Yes. Prepare up to 2 days in advance. Store in the refrigerator for firmest texture, but bring to room temperature 30 minutes before serving for best flavor.
- → What if I don't have an 8x8 pan?
A 9x9 pan works but will yield slightly thinner bars. A 9x13 pan creates thinner treats—adjust cooking time accordingly. Line with parchment for easy removal.